
January 23, 2014 05:03 by
 Ben
Ben
IIS (Internet Information Services) is a secure, reliable, and scalable Web server that provides an easy to manage platform for developing and hosting Web applications and services. In this tutorial I have explained all the setting to run the site successfully from IIS on local computer. Let's move to the procedure of deploying website.
Step 1: Run IIS by typing the command in inetmgr in windows command prompt

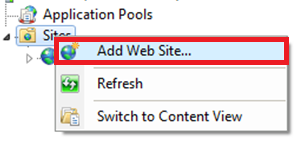
Step 2: In IIS right click on Sites Node and then Select Add Web Site as shown in the diagram below:
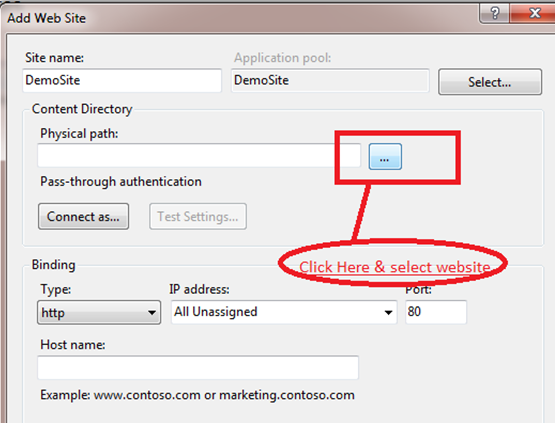
Step 3: Inside Add Website Window type the name of website under Site name and in Physical path select the location of the website on the local system.
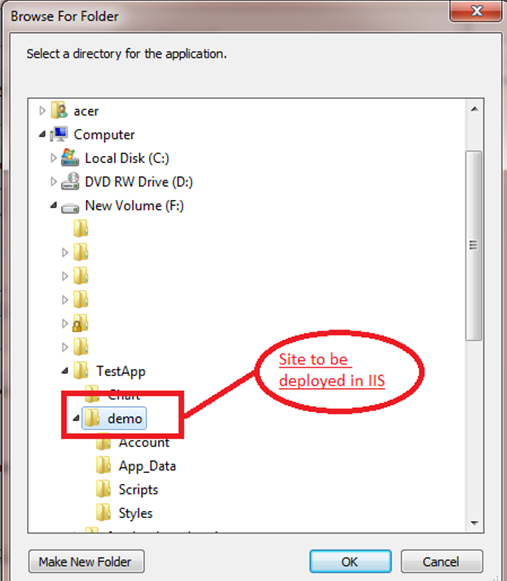
Step 4: Select the site to be added in this project I have created website with the name Demo in .net and stored it on F drive of my computer. I am browsing that website for deployment . You can select your site to be added in IIS as shown in the diagram below:
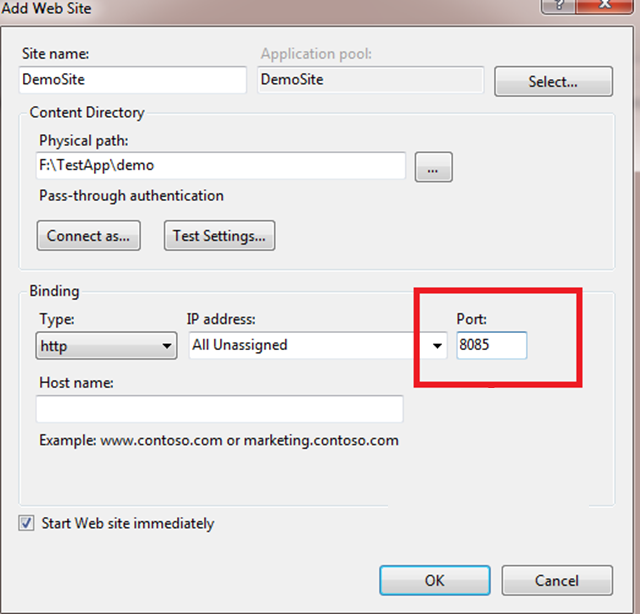
Step 5: Under Binding change the port Number from 80 as it is the default port and assigned to Default website in IIS . I have set the port number to 8085.
Step 6: Next select the Application Pools in the left side in IIS then Right click on the Name of website added in the previous step and then select Advanced Settings
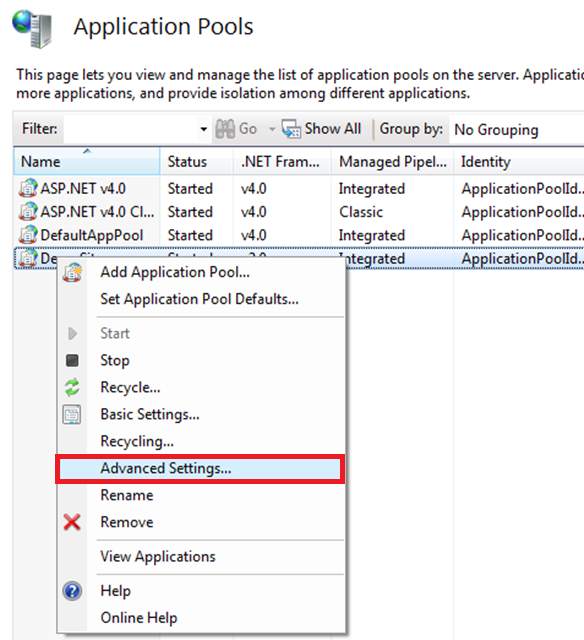
Step 7: In the Advanced Settings select the .Net Framework Version 4.0 and then click on ok button.
Step 8: Select the website and then double Click on Directory Browsing and Enable it.

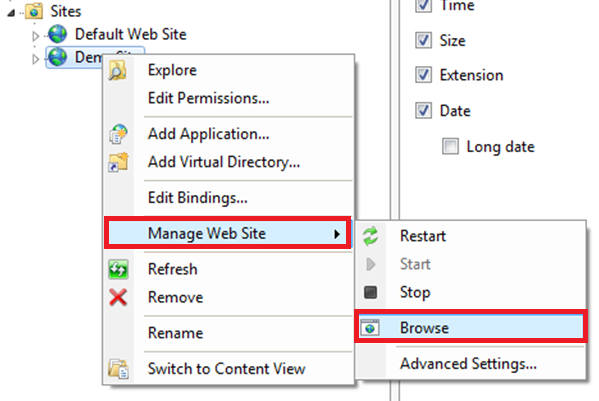
Step 9: Now the whole procedure of adding website is done now to check the site in browser Right click on the website you added in IIS then go to Manage Web Site and then click on Browse.
45254476-b59b-47ad-ba86-6e23624244cb|0|.0